Watermelon Pop Magic

Caroll Alvarado
| 19-08-2026
 · Cate team
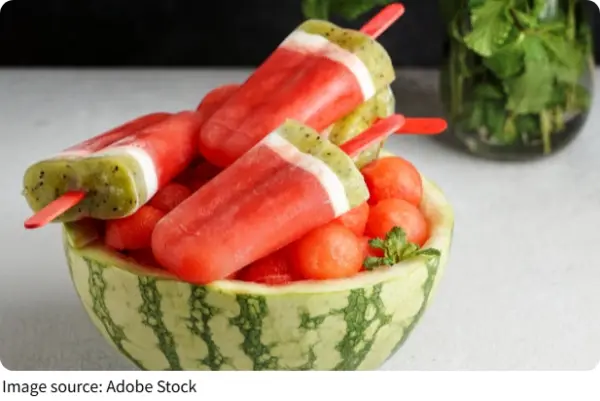
Lykkers, watermelon-shaped popsicles are playful, colorful, and much easier than they look. You get a juicy red fruit layer, a creamy pale middle, a green kiwi edge, and tiny chocolate pieces that mimic watermelon seeds. The only real challenge is waiting between layers while the freezer does the work.
This recipe is perfect for hot afternoons, summer gatherings, or any day when turning on the oven feels like a questionable life choice. The finished pops look cheerful, taste fresh, and give you plenty of room to adjust sweetness depending on the fruit you have.
Freeze A Tiny Watermelon
This recipe makes about eight popsicles. You will build the colors in stages, so each layer stays visible. The process is simple, but giving each section enough freezing time makes a big difference.
Ingredients
- 3 cups seedless watermelon cubes
- 2 tablespoons fresh lime juice
- 2 tablespoons honey
- 3 tablespoons mini chocolate chips
- 3/4 cup plain Greek yogurt
- 2 tablespoons whole milk
- 1 tablespoon honey
- 3 ripe kiwis
- 2 tablespoons cold water
- 1 tablespoon honey
- 1 teaspoon fresh lime juice
- 8 popsicle sticks
- 8 popsicle molds
Step 1
Add the watermelon cubes, 2 tablespoons lime juice, and 2 tablespoons honey to a blender. Blend until completely smooth.
Taste before pouring. Very sweet watermelon may need less honey, while a milder one may appreciate the full amount. Fill each mold about two-thirds full with the watermelon mixture. Add a few mini chocolate chips and gently push them toward the sides with a spoon so they look like tiny seeds.
Freeze for about 60 minutes, until the surface feels firm enough to support another layer.
Step 2
Mix the Greek yogurt, whole milk, and 1 tablespoon honey until smooth.
Spoon a thin layer over the partially frozen watermelon mixture. Keep this section fairly narrow so it resembles the pale area between the fruit and the green rind.
Insert the popsicle sticks now if your molds require them. Freeze again for about 45 to 60 minutes. If a stick starts leaning, straighten it before the yogurt becomes completely firm. Frozen yogurt is not especially open to negotiation.
Step 3
Peel the kiwis and place them in the blender with cold water, 1 tablespoon honey, and 1 teaspoon lime juice. Blend until smooth.
Pour a thin kiwi layer over the frozen yogurt section. Leave a little room at the top of each mold because frozen mixtures expand slightly.
Return the molds to the freezer for at least 5 hours. Overnight is even easier because nobody has to keep checking whether dessert has finally decided to cooperate.
Step 4
When ready to serve, hold the outside of each mold under cool-to-lukewarm running water for about 10 to 15 seconds.
Pull the popsicles out gently. If one refuses to move, give it another few seconds under the water rather than forcing it.
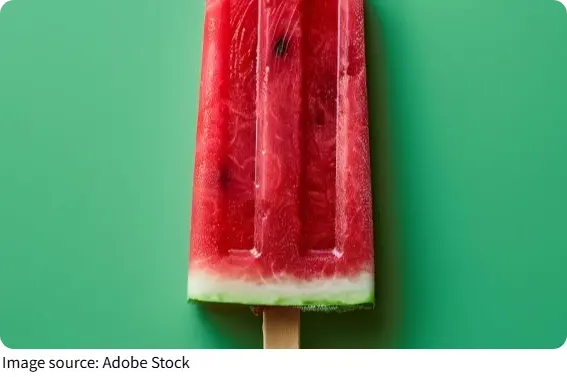
Serve immediately. You should see the red watermelon center, pale yogurt layer, green kiwi edge, and little chocolate details all in one cheerful frozen treat.
Keep The Layers Happy
Frozen fruit desserts are simple, but texture, sweetness, and freezing time all matter. A few small choices will keep your pops colorful, easy to remove, and pleasant to bite.
Start With Sweet Watermelon
Watermelon provides most of the flavor, so choose a ripe one with juicy, sweet flesh.
Taste it before blending. If the fruit is already very sweet, reduce the honey slightly. Frozen desserts often taste less sweet than fresh mixtures, but you still do not need to turn the red layer into syrup.
Lime juice keeps the watermelon flavor bright and prevents the final pop from tasting flat after freezing.
Avoid adding extra water to this layer. Watermelon already contains plenty of liquid, and too much can make the finished texture harder and icier.
Freeze Before You Layer
The key to keeping those watermelon colors separate is patience. Each layer needs enough time to become firm before the next one arrives.
If the red layer is still very soft when yogurt is added, the colors may swirl together. That will still taste good, but the tiny watermelon may suddenly become modern art.
The layers do not need to freeze solid each time. They only need enough structure to hold what comes next.
Freezer temperatures vary, so use the times as a guide rather than a strict rule.
Make Kiwi Stay Fresh
Ripe kiwi gives you natural green color and a bright tangy flavor. Choose fruit that feels slightly soft when pressed.
Very firm kiwi may taste sharper, so increase the honey by another teaspoon if necessary. Blend only until smooth. Excessive blending can change the texture and make the tiny kiwi seeds more noticeable.
If kiwi is unavailable, green grapes can work too. Blend 1 1/2 cups green grapes with 1 teaspoon lime juice and a small amount of honey for a lighter green layer.
Get The Texture Right
Greek yogurt creates a creamy middle layer that contrasts nicely with the fruit. Whole milk loosens it just enough to make pouring easier.
If your yogurt is especially thick, add another teaspoon of milk. If it is already soft, you may not need the full amount.
For a dairy-free version, use thick coconut yogurt and the same quantity of plant-based milk. The flavor changes slightly, but the three-layer idea still works.
Store Them Smartly
Once completely frozen, remove the pops from their molds and place them in a freezer-safe container with baking paper between each one.
This frees the molds for another batch and makes serving easier later. Keep the container securely closed so the pops do not pick up other freezer aromas.
For the freshest flavor and best texture, enjoy them within about two weeks.
If they feel extremely firm straight from the freezer, leave them at room temperature for about 2 minutes before eating. That short pause makes the fruit layers easier to bite.
Lykkers, watermelon-shaped popsicles turn simple fruit into a cheerful frozen treat with very little active work. Keep the layers separate, use ripe fruit, and let the freezer handle the difficult part. Once the pops come out of their molds, they look far more impressive than the effort involved, which is exactly what summer dessert should be.